 |
 |
|
Site Index
|
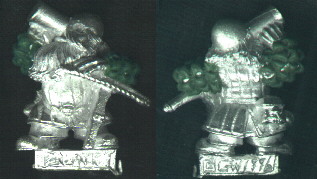
Converting Imperial Dwarves Over the years I've acquired some dwarf miniatures here and there, with the remote intention of eventually building them into a workable army. Of course, one can only have so many projects and hope of ever completing half of them in one lifetime. [I'm way past that, but anyway.] So, I decided to cut back on the number of armies I'd seriously get into and the dwarves were among the casualties. Now I had two choices: I could either sell them off, which would in any event get me less than the initial cost, or find a use for them within my existing forces. The latter option prevailed and most of my dwarves found their way into my Imperial or Norse (viking) armies. While some of the old "Marauder" dwarf miniatures already showed some renaissance influences, I started to look for ways to emphasize this. You can see some of the results on this page.
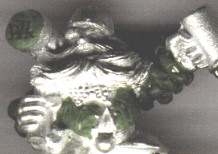
This drinking
dwarf would add a characterful touch to any unit of Imperial dwarf crossbowmen,
were it not for the fact that he wasn't really dressed for the part. Not
wanting to detract too much from the original figure, I decided I would
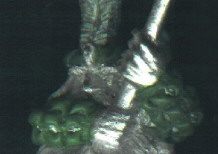
give him the typical puffy sleeves and leave the rest as it was.After
trying a few different ways to achieve this effect, I found out that the
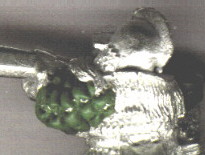
easiest way to get a decent result was the following: Start with making
a thin snake of greenstuff. Lay this on his arm, from the shoulder to
the wrist. Be careful not to flatten it. Then get a sculpting tool (a
needle or toothpick will do) and press this in the green stuff, dividing
it into smaller sections, all the way down. Now get a second piece of
greenstuff, that you put next to the first one, but leave a little bit
of space, so they don't touch (yet). Repeat the action, making sure you
keep the same intervals (you will have to resize the sections somewhat
where the arm is bent).
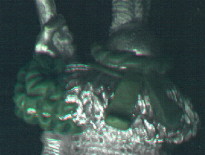
When you
press down on the greenstuff with your sculptingtool (or needle or whatever
you're using to separate the sections from eachother), try to arrange
it so that the two adjacent rows of greenstuff are joined together in
this place (hence the need for keeping the same intervals where the arm
is held straight). Use these mergingspots for a measure where the arm
is curved. Repeat this action all the way around the arm and there you
go.
There are a few more examples below. You can also
look at some Imperial Halfings converted using
the same principles.
The one to the left above had the initials "WK" engraved in his hammer, by first adding a thin layer of green stuff to it and then carving the letters in the slightly cured putty with a thin needle or sculpting tool. His jacket received another thin layer, so that a couple vertical slashes could be made on either side. You can do the same to the back with horizontal, vertical or diagonal slashes or arranged in a pattern, like 4 tiny slashes in an "X" shape (but don't cut all the way through the center of the cross). |
||||||||||||
Return to the Conversion Atelier Back to the White Knight's Miniature Castle
|
|||||||||||||
|
|||||||||||||
|
|||||||||||||
|