 |
 |
|
Site Index
|
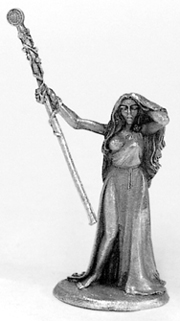
Winged Wood Elf Queen If you're a Wood Elf general you'll know there aren't many minis out there to represent the queen of your natureloving woodkin elves. Sure, there have been several metal incarnations of LOTR's Galadriel, but none I really liked. The concept of GW's Wood Elf queen was not a bad one, but the mini itself didn't strike any high chords, she just looked too plain to be an elf. No, the only way I was going to have the elf queen miniature I wanted, was if I converted it myself...
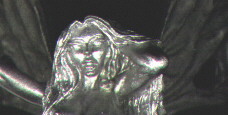
The first task was to find a suitable model as the base for our queen. As it so happened, I had a very nice Ral Partha "Goddess of Love" miniature that would be perfect for the part. The
mini is part of their "Heroes and Horrors" range, catalog code: 01-008
and is still available from Iron
Wind Metals in the US or Ral
Partha Europe in the UK... What's
more, this miniature is almost 50mm tall and is bound to stand out amidst
your regular wood elf troops. Another reason is of course the fact that
I already had it in my possession...
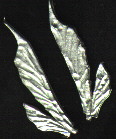
Now, I also wanted her to have fairy-style wings. These were graciously donated by an unsuspecting Crucible Wild Elf fairy. The actual fairy was safely put away for a later conversion. Of course there are other wings you could use (Fairymeat comes to mind). The wings in the picture to the left are not the ones that were actually used (you can see those on the finished model), but are from the same set.
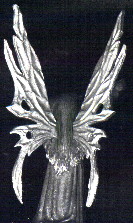
When you examine your work you will notice that the natural flow of the model's hair has been interrupted by the wings. It's time to get out the greenstuff to resculpt some of the hair in the affected area to make it appear as though it's flowing more naturally around the protruding wings. Basically, the sculpting is done by drawing fine lines with a (wet) needle on a (very) small amount of greenstuff. It is best to wait until the putty has cured just a little bit. Sculpting hair on fresh putty can be a real pain. Just dont wait too long or you'll find that it hardened already and you'll have to start over. While
I was doing this, I also added the tip of a pointy ear peaking through
her hair. I only did the right ear as she's running her fingers through
her hair on the other side. Naturally, none of this shows up in the pictures.
[#&@§%!]
You
can stop here, if you're wise enough to know when not to push your luck
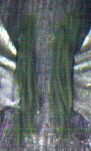
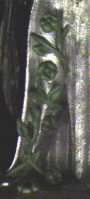
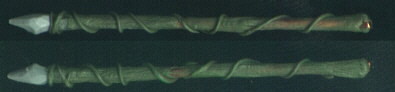
Further modifications are possible, but not really necessary. Another thing I wanted to change was her staff. You could very well use the one that comes with the miniature, but I wanted to personalise her some more, so I decided to make one from scratch.
The
main body is a straight length of copper wire. The stone on the tip was
carved out of a piece of plastic sprue and attached to the staff. The
wire was covered in greenstuff (not too much or you'll have her carry
a small three around and that's not very practical). The greenstuff was
then attacked with a fine needle to give it a wood texture, much like
the hair-repair earlier. It doesn't show up well in the picture, but it's
there. As you can see in the picture the copper is poking through on the
lower end, which I will have to fix with some more putty. When this first
layer hardened, some vines were added. I will go back to this later and
maybe add some small leaves as well.
|
||||||||||||||||
Return
to the Back to the White Knight's Miniature Castle
|
|||||||||||||||||
|
|||||||||||||||||
|
|
|||||||||||||||||
|